As you must know, Twitch is currently one of the most popular streaming platforms with a vast user community.
The platform makes it really convenient to stream using different programs and tools.
Broadcasting from a PC is the most common approach among streamers, but some gamers find it more enjoyable to use Twitch directly from a gaming console.
Many consoles have the option for linking to Twitch integrated into them.
However, some require you to do extra work to make it happen, and PS3 is one of them.
Read on to learn how to stream PS3 and other consoles on Twitch.
How To Stream PS3 On Twitch

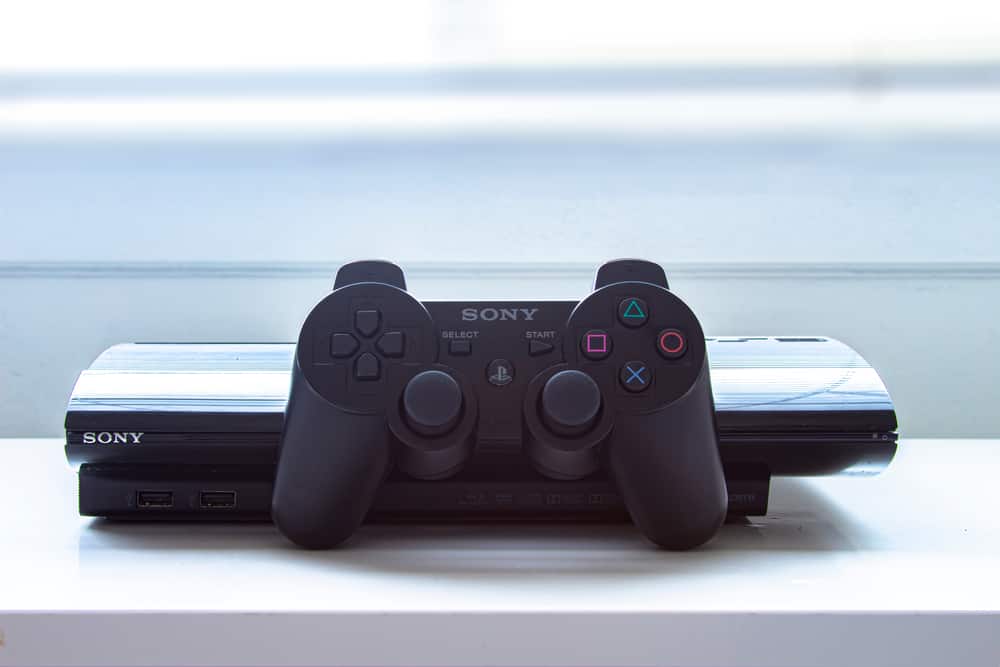
The PlayStation 3 is Sony’s third video game console.
It has enhanced features compared to the previous versions, including playing Blu-Ray videos, and it can stream media to online platforms.
However, to stream live on the internet using your PS3, you’ll need to hook it up to a capable PC and a dedicated capture card.
Follow these steps to share your gaming with others through Twitch on PS3.
1. Create A Twitch Account

If you haven’t already, create a Twitch account on your mobile or computer.
At this stage, you don’t need to pay for a premium account as a free account supports streaming, chatting, and following different channels.
Make sure you turn on the two-factor authentication to keep your account safe.
To turn on 2FA, you need to have verified your email.
If you haven’t, head to Settings > Profile, find your email address, and follow the indicated steps.
Then, go to your Security and Privacy settings section, click Set Up Two-Factor Authentication, and then click Enable 2FA.
Next, enter your phone number, hit continue, and wait until you receive a seven-digit code via SMS.
Enter that code and you’re all set.
From now on, every time you want to login to Twitch, in addition to your password, you’ll need to enter an auto-generated code.
This may sound inconvenient, but the extra layer of security is definitely worth it.
Plus, you can install easy-to-use apps like Google Authenticator or Microsoft Authenticator to make the code generation process easier.
Refer to Twitch’s help center for more information on the topic.
2. Choose The Right Capture Card
Capture cards are small physical devices that link your PC and TV to your console.
They act as an interface, allowing you to send the audio and video from your gaming console to your PC.
Capture cards don’t come cheap, but they’ll get you the best results.
There are many capture cards you can use depending on your system setup.
If you’re using a desktop, you can get an internal capture card.
You should install it directly into your motherboard, and it will provide you with low latency.
If you’re more comfortable with a more straightforward setup or using a gaming laptop, you can purchase an external capture card.
Most of these capture cards support at least HDMI, but depending on your needs, you can find devices with additional ports like DVI or VGA.
Wireless options are also available, but they tend to be more expensive and trickier to set up.
Because of the nature of the USB connection, you might experience some latency with audio and video delays in your streaming software.
However, you can still get a stable image at 60 frames per second with a resolution as high as 1080p.
Whether you choose the internal or external card, the Elgato brand remains the standard among most streamers.
Head to their official website and find your perfect device.
For PlayStation 3, you can use the Elgato Game Capture HD.
If you end up purchasing this device, go ahead and download the Elgato Game Capture Software and follow the PS3 setup tutorial that Elgato has provided.
Once your physical setup is complete, use this guide to connect to Twitch.
Other respectable brands also have capable capture cards compatible with PS3, including MiraBox, AVERYN, and DIGITNOW.
If you get one of these capture cards, move on to the next steps to set it up.
3. Set Up The Capture Card

Insert the CD or DVD-ROM that came with your capture card into your PC and follow the wizard instructions to install the software properly.
Connect the capture card through a USB port if it’s an external one, and if it’s internal, use this tutorial to install it.
Ensure that the drivers are correctly installed before moving on to the next step.
Open your capture card software and adjust the settings according to your needs after reading the manual.
4. Connect The Wires

You’ll need three RCA wire splitters to connect to your TV’s visual and audio inputs while matching the appropriate colors.
Plug the PS3 RCA cables into the wire splitters while leaving room for the DVD capture card wires.
Refer to the capture card’s manual to find out how to connect its wires to the TV or PS3.
5. Set Up A Broadcast Software

Depending on the capture card you’ve purchased, you’ll need to download and install dedicated broadcast software, like OBS, Elgato Game Capture, or XSplit.
The capture card should support the software to broadcast your gameplay and audio to Twitch.
Explore the settings for each broadcast software and choose the one that suits you best.
The OBS software is the most popular among Twitch streamers, though.
Once you’ve downloaded the program, open it up and select the capture card as your media streaming device.
6. Connect To Twitch

Turn on the PS3 and let the screen load on your broadcast software and your TV.
Open up Twitch on your computer, and sign in to your account.
Enter your stream key into the broadcast software and once you’re linked to Twitch, start your live streaming.
Make sure your internet connection is reliable with sufficient upload bandwidth.
You need 3 to 6 Mbps to avoid lags and breakups.
Also, read Twitch’s recommendations and community guidelines to make sure you play by the rules and people can find your stream on the platform
How To Stream PS4 On Twitch

Streaming on Twitch when you’re playing games on your PS4 is a relatively easy job.
Linking PS4 to Twitch is much easier than PS3 because of the built-in option.
Follow these steps to start your first PS4 streaming session:
- Start a game launch that you want to stream on Twitch.
- Press the Share button on the remote console controller.
- In the Share menu, select the Broadcast Gameplay option.
- Locate and select Twitch from the list of services.
- Log in to your Twitch account if you haven’t already.
- Now head to Twitch’s activation section on your computer or phone and key in the six-digit code on your screen or scan the QR code.
- Select OK to link your Twitch account to your PS4.
- Once the system saves all your login information, all the settings will pop up on your screen. You have to customize your options now, like adding a proper title to your stream, setting up your PlayStation camera if available, or inviting your friends to watch.
- When you’re done customizing, select Start Broadcasting to go live.
If you want to end your broadcast at any time, press the Share button and choose the option for ending the stream.
How To Stream Xbox On Twitch?

Streaming Xbox on Twitch is also easy with the integrated app.
Follow these steps to start your first Xbox stream:
1. Set Up The Twitch App
Go to the Xbox Store from your dashboard and search for “Twitch.” Click on the purple app icon and download it.
If you haven’t streamed on your Twitch account from Xbox before, you need to use an Xbox Live Gamertag account to link the account to Twitch.
Head to the Profile Menu on your Xbox and choose Join Xbox Live.
Then Accept the terms and conditions.
2. Link Your Twitch Account
Log into your Twitch account through Twitch.tv/activate on your computer or phone.
Open the Twitch app on Xbox and tap on the Login option to get a six-digit code.
Use the code to activate your Linkup for Twitch and Xbox One.
3. Adjust The Settings
Navigate to Privacy and Online Safety.
Go to the Xbox Live Privacy section and locate View Details and Customize.
Head to Online status and history and select Everybody.
This process will allow everyone to view your stream.
Then, head to Settings and go to Account.
Select Privacy and Online Settings, and then Xbox Live Privacy.
Choose the View Details and Customize option.
Select Game Content and Click on Allow.
If you want viewers to see your picture, set the option, You can share content made using Kinect or other cameras, to Allow.
4. Start Streaming
In the Twitch app, head to the Broadcast tab to choose your video options, give your stream a name and add your mic and camera if needed.
Go back to the Twitch broadcast menu and select Start Broadcasting.
How To Stream Nintendo Switch On Twitch?

Unlike PlayStation 4 and Xbox, the Nintendo Switch console doesn’t offer a navigation streaming app.
The only method for streaming games from the console on Twitch is by using a capture card, as explained in the first section of this article.
You might think that the lack of a streaming app is a major setback.
That might be true for people who like to jump into streaming right away from time to time, but it comes with its flaws.
For instance, some games on PlayStation tend to block streaming and recording entirely, cutting out some parts of the game and causing issues for the streaming without warning.
Therefore, using a capture card may be better in some ways.
What Are The Minimum Specifications That A PC Needs To Stream?

Suppose you want to stream through a capture card or on a PC.
In that case, your computer should meet the minimum needed specifications, or else you’ll face multiple issues, including low frame rates, poor picture or sound quality, ghosting, pixelization, or stuttering.
The minimum specifications that Twitch recommends are:
- CPU: Intel Core i5-4670 or an AMD equivalent.
- GPU: DirectX 10 compatible or higher (DirectX 11 or 12 is required for modern games).
- Memory: 8GB DDR3 SDRAM.
- OS: Windows 7 Home or newer.
The higher the resolution and frame rate you’ll want your stream to have, the better PC components you’ll need.
Consider the games you’ll want to play and check out their required specifications for smooth gameplay.
Keep in mind that those specs aren’t good enough for streaming while you’re playing.
Your computer may be able to handle good gameplay, but when you start streaming, it’ll be overwhelmed.
Therefore, it would be best if you aimed for higher specs.
What Else Do You Need For Streaming?

You’ll need some equipment other than your console, a capable PC, and a capture card.
First and foremost, you’ll need a stable internet connection.
Twitch’s guidelines state that for streaming 1080p content at 60fps, your internet needs to deliver 4,500 to 6,000 kilobytes per second.
If you want a 1080p resolution at 30fps, you need to provide 3,500 to 5,000 kilobytes per second.
Second, you’ll need to personalize your stream by adding yourself to the game.
You can add in your voice, your picture, or both!
Your audio quality should be crisp, or else people won’t listen to you.
Invest in a high-quality microphone from a reputable manufacturer.
If you have long-term plans for streaming and building an audience, it’s a good idea to get a mic with a few different polar patterns and the right filters to capture high quality.
You’ll probably have to spend around $250 for a decent device.
Showing your face isn’t necessarily required, but if you decide to do it, go for a dedicated external webcam that can support at least 720p resolution at 30fps.
If you’re using a capture card, it’ll define the maximum image quality and frame rate you’ll get, so don’t go overboard with the webcam if your capture card doesn’t support it.
NEXT: My Phone Sent A Text On It's Own (9 Possible Causes)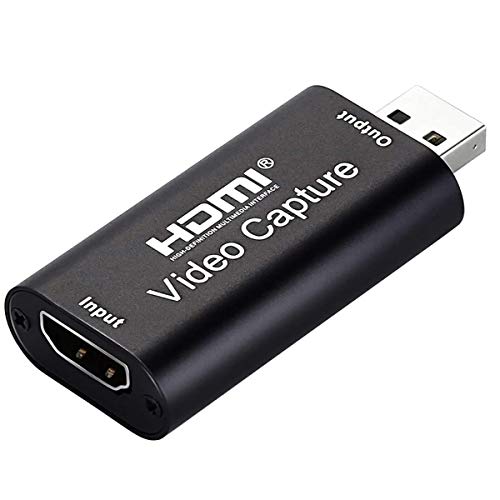






Amazing details I got from your blog, Good content! I am just reaching out because I keep up the good work & so do you.